Tuesday, October 27, 2015

Assignment 8 Dedicated Flash

Here is how to change the flash sync speed in Av mode:

Use direct flash on camera Aperature Priority (Av) setting at 1/200 sec shutter speed
Use direct flash off camera Aperature Priority (Av) setting at 1/200 sec shutter speed
Use flash fill Aperture Priority Auto shutter speed
Use flash with modifier (Bounce card, bank or ceiling) Aperature Priority (Av) setting at 1/200 sec shutter speed.

Label your best result from each of the 4 techniques, write down your camera settings for each photograph and post them separately.


Read the two pages (posted  in the Lesson 9 section) from the Canon 580EXII or the Canon 600EX manual to help understand what the settings mean

Lesson 8 Dedicated Flash


Some photographers who use off camera flash extensively:

Bruce Gilden Website

Instructions for using Canon Speedlite 580EX

 Instructions for using Canon Speedlite 600EX-RT

Tuesday, October 20, 2015

Assignment 7 Strobe and Continuous LED Light

The following exercise can be performed once as a group.

1.  Photograph a person with just the strobe light on the person and a while background recording as black holding the Grey Card.
2.  In Lightroom Develope mode using the White Balance Eyedropper, click on the Grey Card and record the Color Temperature and Tint. 
3.  Photograph a person holding a Grey Card against the background with just the LED light on.  Dial in the Light Balance and Tint with the numbers that match the Strobe Light Balance.  Tweak the numbers until the resulting numbers in Lightroom match the Strobe numbers.   Record the final number you set on the LED panel and  what the resulting numbers are from Lightroom.
4.  Photograph a person using strobe on the person and LED
on the background combined
5.  The 1st 3 photographs should be laid out together labeled with the f stop, shutter speed and Light Balance numbers.

The following exercises should be done by each member of the group

Each member of the group should individually photograph the scene above with motion. and post the best picture.

Each member of the group should change the FUNC to Hue/Saturation and dial in a color on the LED and photograph the results  Post the results.


The following exercise can be performed once as a group. 

1.  Photograph a person holding a Grey Card against the white background with just the Tungsten light on.
2.  In Lightroom Develope mode using the White Balance Eyedropper, click on the Grey Card and record the Color Temperature and Tint. 
3. Photograph a person with just the LED light on the person and the white backfround recorded as black.   Dial in the Light Balance and Tint with the numbers that match the Tungsten Light Balance.  Tweak the numbers until they match. Record the final number you set on the LED panel and  what the resulting numbers from Lightroom.
4.  Photograph a person using Tungsten on the background and LED
on the person combined.
5.  The 2nd 3 photographs should be laid out together labeled with the f stop, shutter speed and Light Balance numbers.

Lesson 7 Strobe and Continuous Light Plus Color Temperature


Live View with EOS Utility and Lightroom CC

Using Canon EOS utility has a great advantage in Still Life in that you can see in real time how your light is looking on the object.  It is especially useful for placing reflectors and gobos.  I have made a list of setting in order to use the Canon 5DMIII with Live View in the EOS utility with Lightroom CC.
There are some important settings on the Canon that must be made:
1.       Go to the Menu with a Camera and 4 dots. 
2.       Go to Exposure simulation and set to Disable
3.       Go to Silent LV shooting and set to  Disable.  (Must have this set so that the flash will fire when we make a picture with Live View on).
4.       Go to Custom Controls and assist the focus start button to *                      
Tether the camera and have it turned on.
Now open the Canon EOS utility.  
1.       Click on Camera settings/Remote shooting.  You should see the remote shooting screen with all you camera settings.  The settings can be changed on this screen.
2.       Next go to the Preferences Screen
a.       Basic Settings only check the Show main window button.
b.      Destination Folder change the folder to Watched Folder on the desktop and keep everything else unchecked.
c.       File Name  Do not modify
d.      Download Images  set to Images not yet downloaded
e.      Remote Shooting check box for Save also on the camera’s memory card
f.        Linked software None
g.       OK
Now open Lightroom and make the following changes:
1.       File®Auto Import®Auto Import Setting
2.       Set the Watched folder on the desktop
3.       Set the destination folder to somewhere not on the desktop.
4.       File Naming set to Filename.
5.       Make sure the Enable Auto Import is checked
6.       OK

Go back to the remote shooting screen and press the Set-up menu then press the Live View/Movie func.set. button.
1.       Under LV func. Setting check Stills only
2.       Under Screen settings click Still display
3.       OK

Now click Live View shoot button
1.       Set the white balance to Auto (give a better preview image and does a decent job with the capture)
2.       Play with the focus setting and see what works.
3.       Take a picture with the remote button and make sure the flash is firing.


Wednesday, October 14, 2015

Assignment 6 Size Matters

Take two portraits of a person one with the 21" Beauty Dish and one with the Octabank and get the same results by using the placement of the subject, the light and the background. Look at results from class demonstration for ideas.

Lesson 6 Size Matters


Wednesday, October 7, 2015

Assignment 5 3 Light Approach

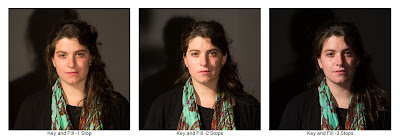
Using classic Rembrandt light (45 to side 45 up) create a portrait with key , fill 2 stops under exposed and backlight. Check the class blog under Lesson 4 to see how it should be laid out.

Using three lights invent your own formula.
Post one separate finished photograph for this one

Lesson 5 3 Light Approach

Links to some of the photographers who use lights from multiple directions:
I also talked about how Irving Penn worked with window light
\


Inspirational Portraits


Hurrell's Fleetwood Mac Images from 1980
How to use the Sekonic L-358 to calculate EV difference between the key and fill light:
1.  Read the Key light 
2.  Press the Memory Button
3.  Press the ΔEV Button
4.  Read the Fill light while keeping the Measuring Button Pressed


Thursday, October 1, 2015

Assignment 4 Simulated Window Light

Using the Simulated Window Light setup in the studio and being inspired by the examples on out class blog, create lighting that you find meaningful.  Spend some time experimenting with positioning the subject in relationship to the window light and point of view of the camera.  Try different sized and surfaced reflectors at varying distances.  Each member should have enough time to come up with several lighting variations.  Post your favorite results.  1-5 images.